FTP stands for File Transfer Protocol. One can upload files & folders to his/her hosting space using FTP. Let’s learn about uploading files using FTP.
How to Upload files using FTP
STEP 1: Download a FTP Client. We recommend using FileZilla. Download FileZilla for 32 Bit or 64 Bit and install it on your machine.
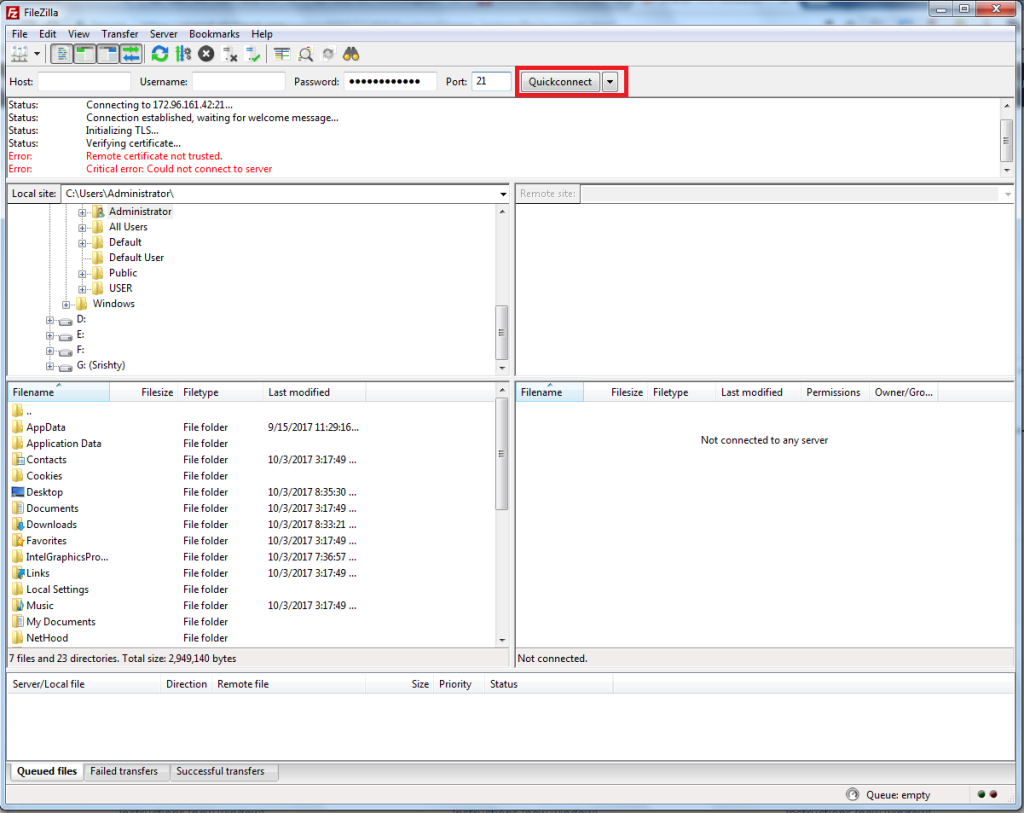
STEP 2: Double click on the FileZilla icon on your Desktop to open it.
STEP 3: Input your Hostname, Username, Password & Port & click on ‘Quick Connect’ to connect to your WebHost. If you do not have a FTP Account you can create a FTP Account.
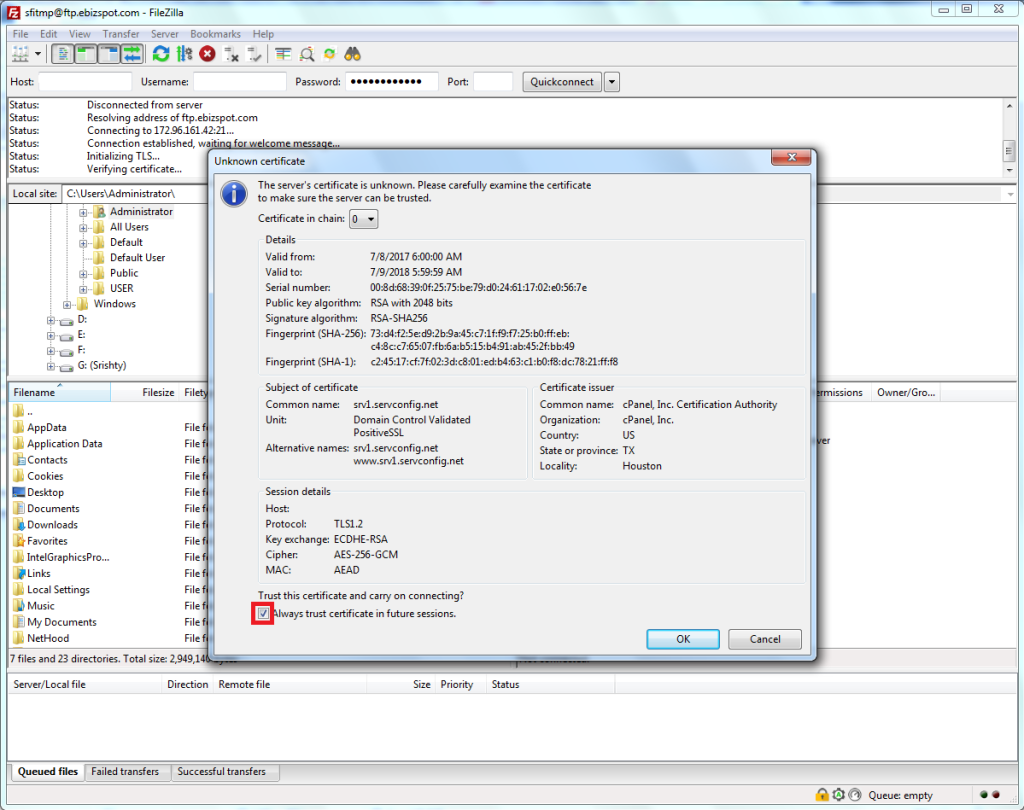
STEP 4: If you’re using FileZilla for the first time you may see a warning regarding certificate. Check ‘Always trust certificate in future sessions’ & click ok.
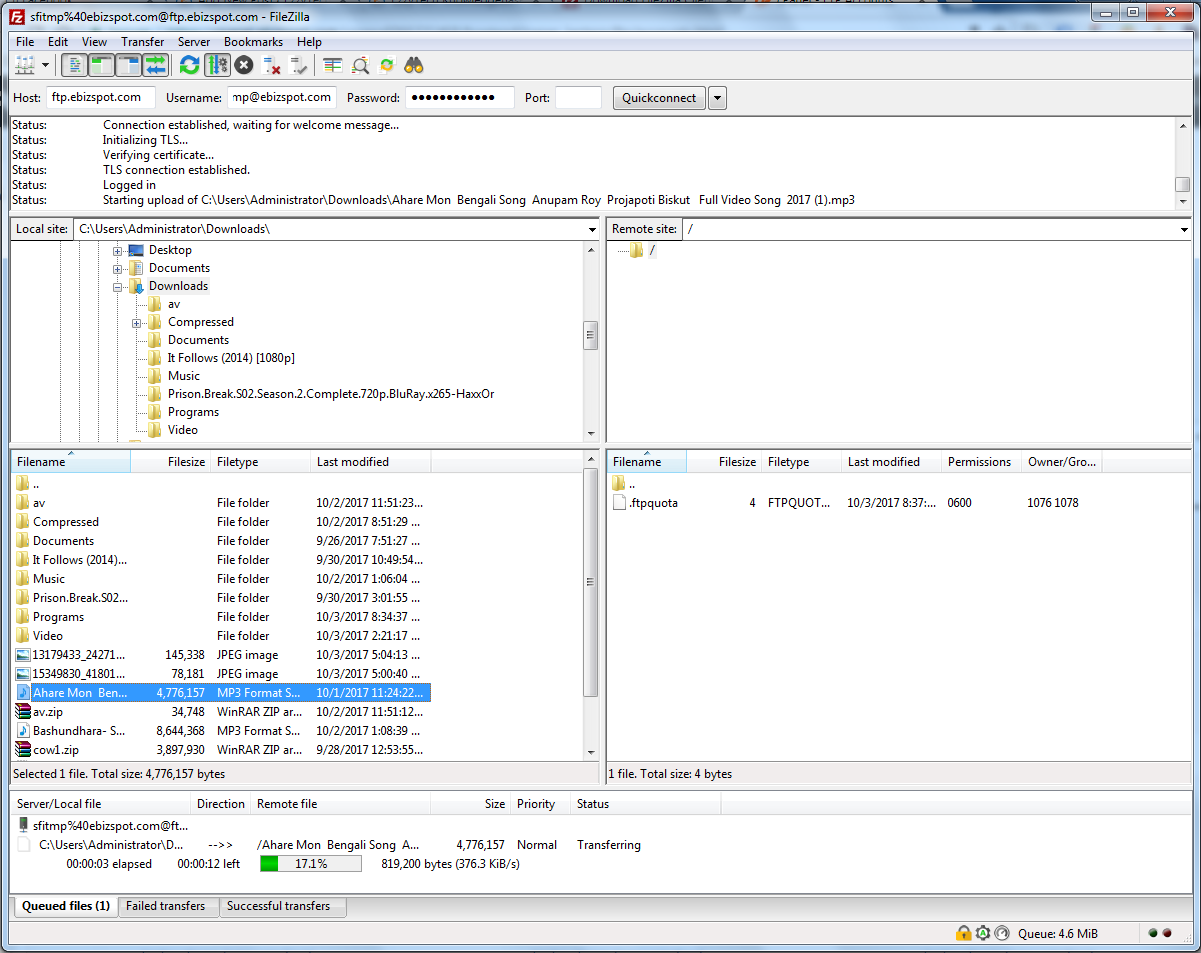
STEP 5: Now you’re connected to your WebHost. You’ll see files on your Hosting Space on the right pan & files in your local machine on the left pan. Simply click on your desired file on the left pan & drag it to the right pan to start uploading. You’ll be able to monitor the upload progress on the bottom of FileZilla software.
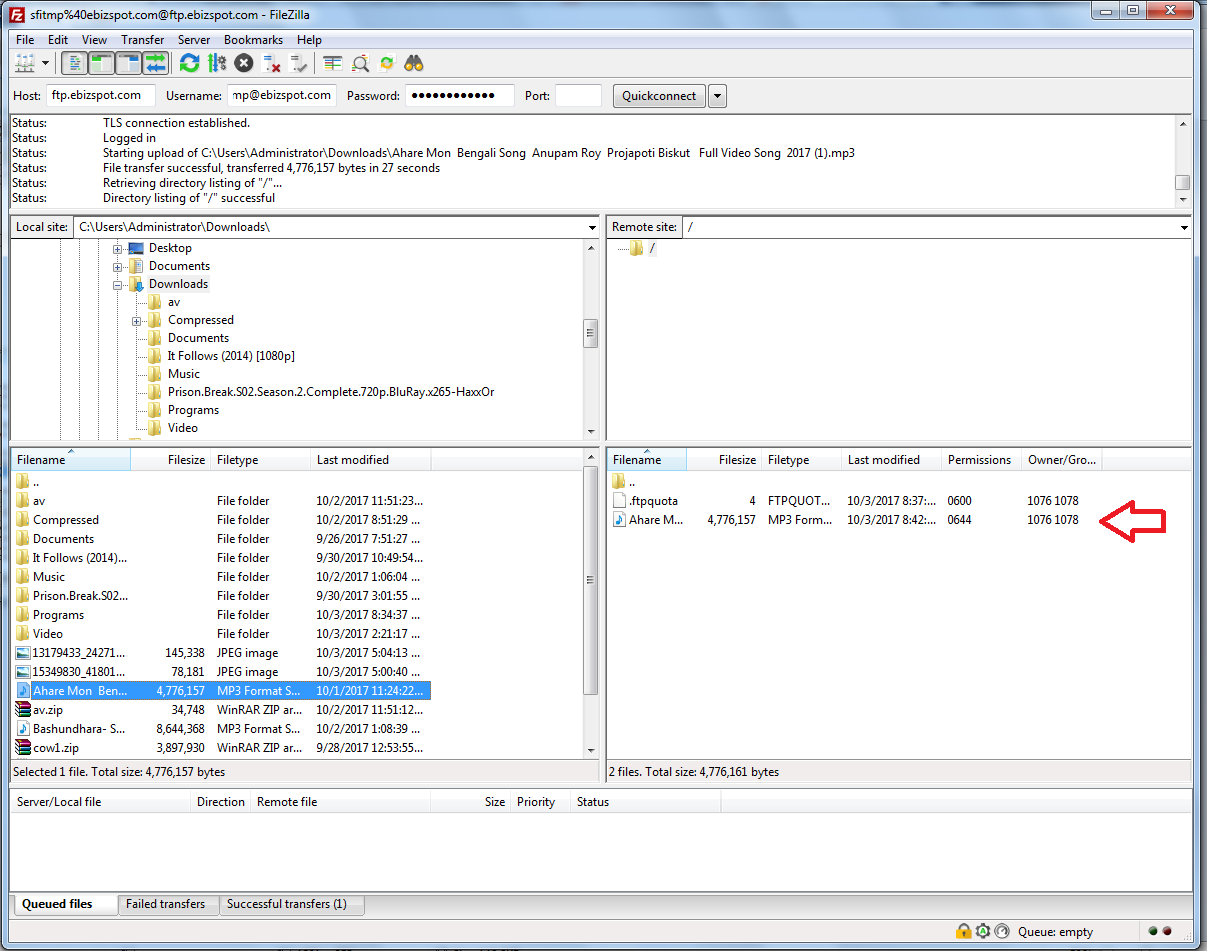
STEP 6: Once your file is uploaded you’ll see the file on the right pan.
Congrats, you’ve successfully uploaded the first file using FTP.
We hope this tutorial helps you find the perfect solution. If your like our tutorials, definitely you’ll love our support. All VernalWeb hosting plans include 24/7 support from our amazing inhouse support staff. Check out our web hosting plans and have your website migrated today!


