
Softaculous is a tool within your cPanel that you can use to easily install programs such as WordPress, Joomla or Drupal. Using Softaculous for installing various scripts not only easy to manage, it saves huge time with it’s tremendous automation.
In this tutorial, I will show you how to install WordPress using Softaculous.
Step 1: Login to your cPanel account.
Step 2: Click on Softaculous Apps Installer which is under Software section.
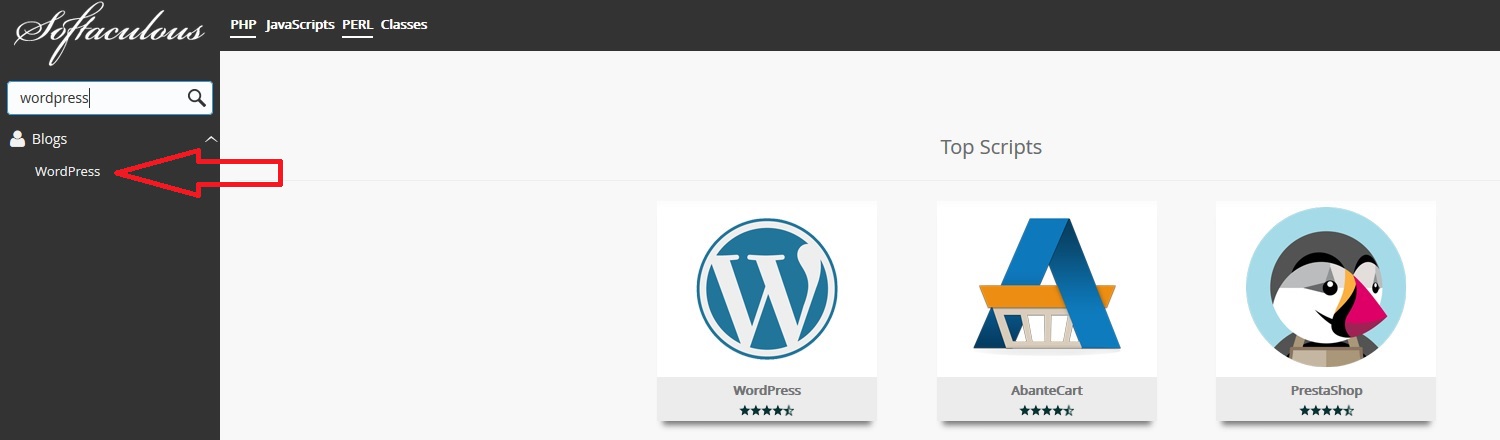
Step 3: Find WordPress and click on it.
Step 4: Now Click on the Install button in the menu bar.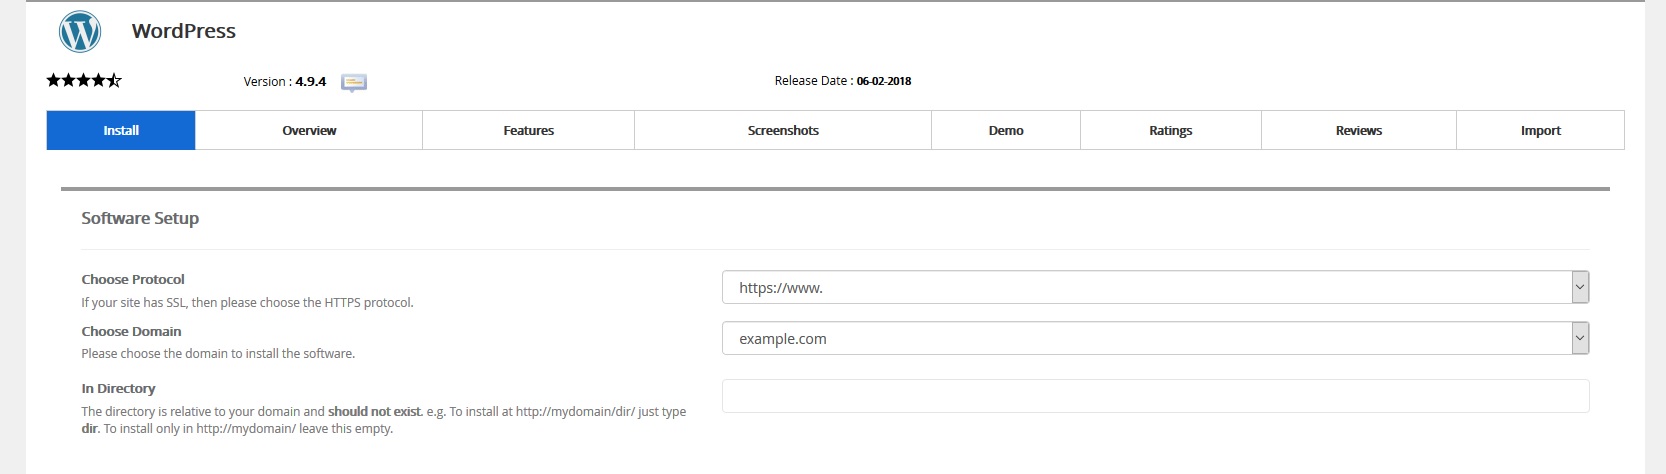
Step 5: In the Software Setup portion, there are three sections to work. If you have SSL (HTTPS) enabled in your website, please choose the HTTPS protocol in the Choose Protocol section. Otherwise select HTTP protocol.

In the Choose Domain section, insert your domain name i.e yourdomain.com. If you want to install WordPress in a directory, insert your directory name in the 3rd section(In Directory).

Step 6: In the Site Settings portion, insert your website name/title and description.

Step 7: In the Admin Account section, input your website administrator username, password and email address. You will need these three elements to access your WordPress Dashboard. So keep the records in a safe area.Please note that, do not use common/dictionar words as admin user and password. Try to use something uncommon. This is very important to keep your website secure and protected from unauthorised someone.

Step 8: If you want to limit user login attempt, select check mark the Limit Login Attempts (Loginizer) plugin.
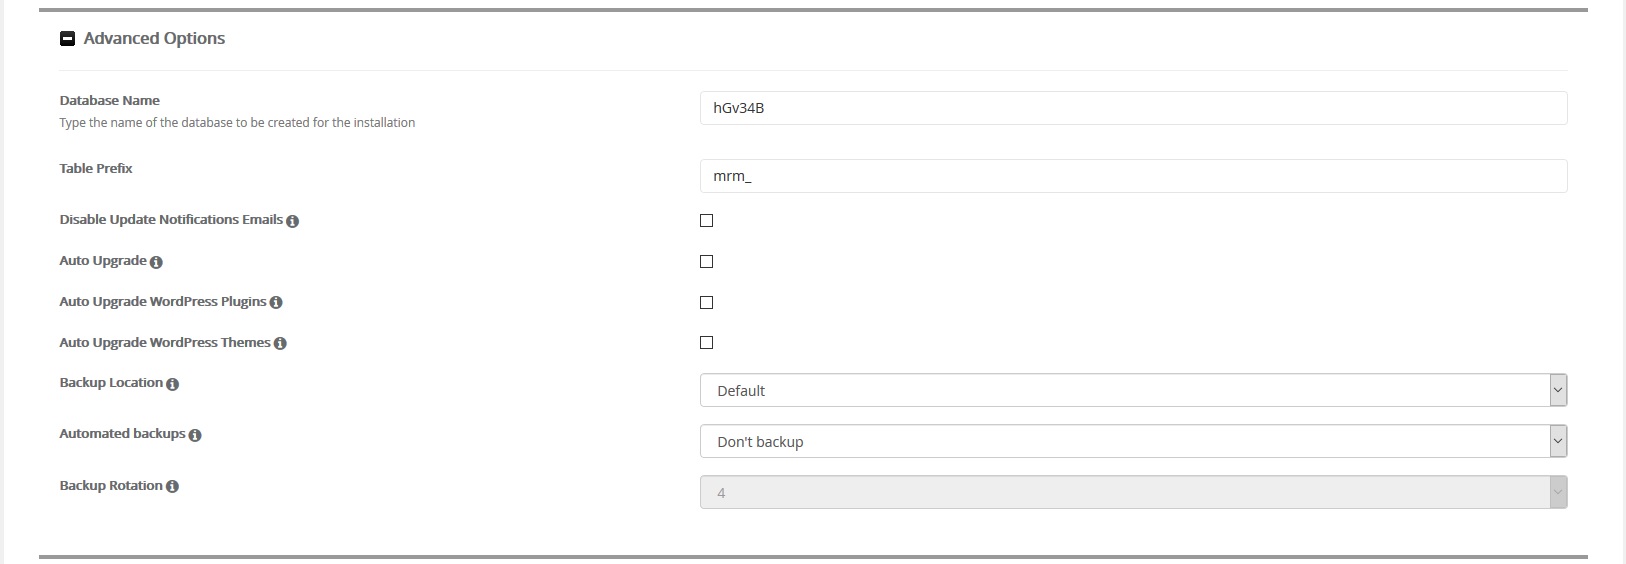
Step 9: If you want to change database and backup settings click on the Advanced Options. This section is important to keep your site more secure. Change the database name and table prefix to avoid Bruitforce Attack.
Step 10: Now scroll down and click on the Install button. if you want to send the installation details to your email address, insert your email account in the blank area just under the Install button.
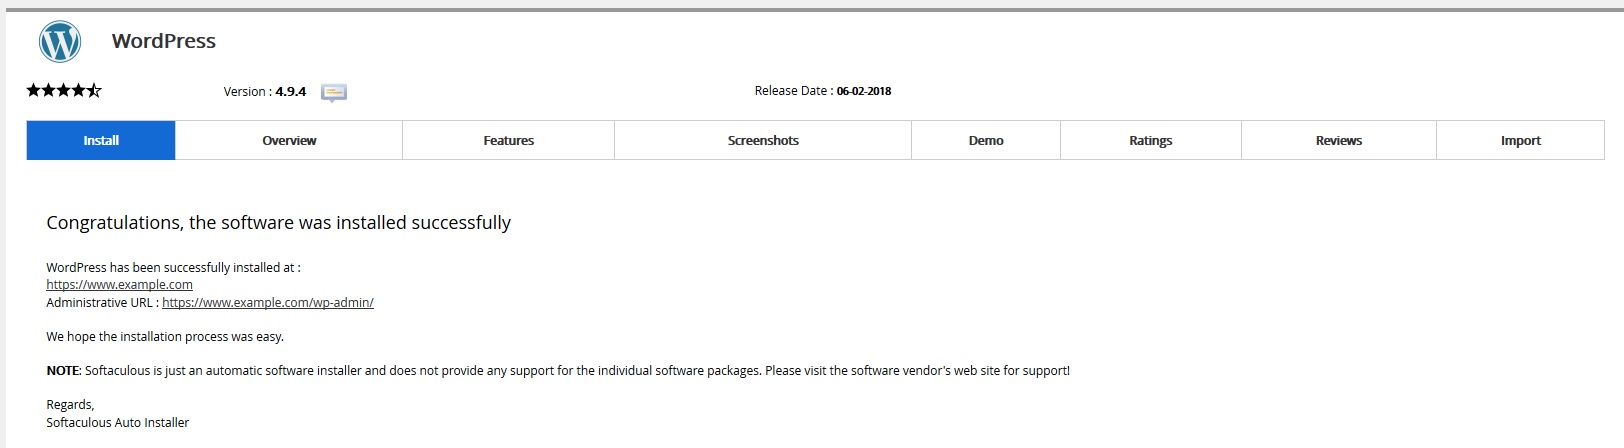
And finally you have installed WordPress CMS successfully. Now click on the https://yourdomain.com/wp-admin/ to access your Admin Dashboard.
We hope this tutorial helps you find the perfect solution. If your like our tutorials, definitely you’ll love our support. All VernalWeb hosting plans include 24/7 support from our amazing inhouse support staff. Check out our web hosting plans and have your website migrated today!