
You can install WordPress easily with 1-click script installer like Softaculous. In case you don’t have Softaculous Apps Installer, you have to install WordPress in your server manually. So you have to download WordPress files from their website and upload them to your server, create database and configure your WordPress CMS properly to work smoothly. In this tutorial, we will learn step by step on how to install WordPress manually.
WordPress Manual Installation Steps:
Step 1: Download the latest version of WordPress from their website: https://wordpress.org/download/
Step 2: Login to your cPanel account.
Step 3: Go to File Manager and upload the WordPress file. If you want to install WordPress in any directory, create and select the directory and upload the file there.
Step 4: Extract the WordPress zip file in the directory for your WordPress site.
Step 5: Create a database and Database user. Now add the user to the database with full permissions.
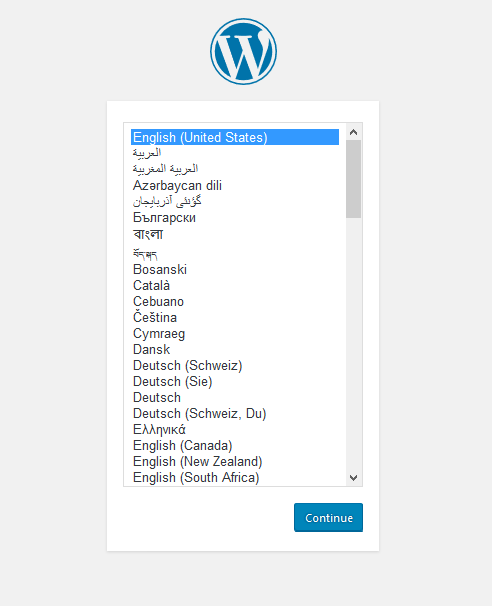
Step 6: Now visit your domain where you are going to install WordPress i.e http://www.example.com or http://www.example.com/directory/ or http://subdomain.example.com (If using subdomain). You will find the language setup page here. Select your preferred language and click Continue.
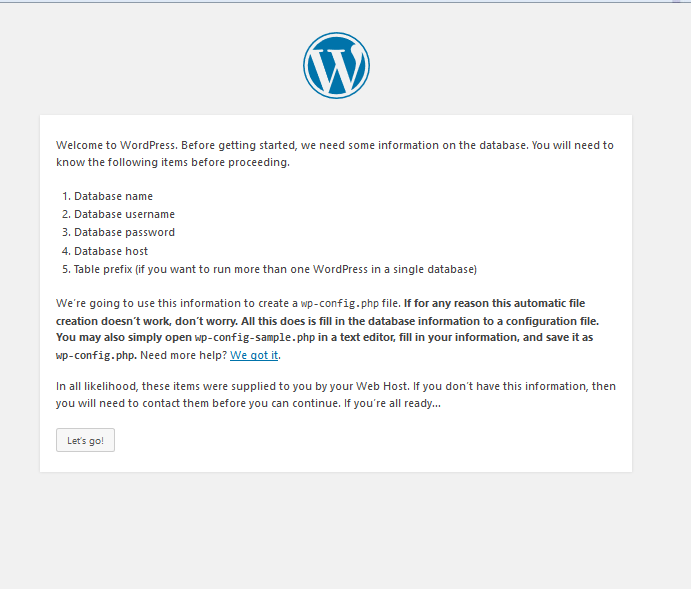
Step 7: Now you will see the list of the requirements for proceeding with the manual installation. You will see that it asks for the information you used to create your WordPress database. Once you have this information, click on Let’s go!
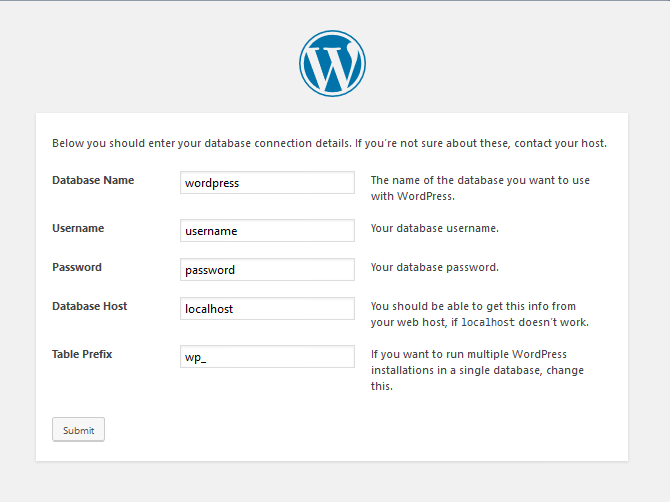
Step 8: Insert all the database information applicable to the right blank spaces. Once the task is done, click on the Submit.
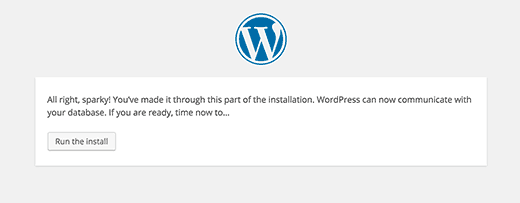
Step 9: WordPress will now connect to your database and will show you a success message. Click on Run the Install button to continue.
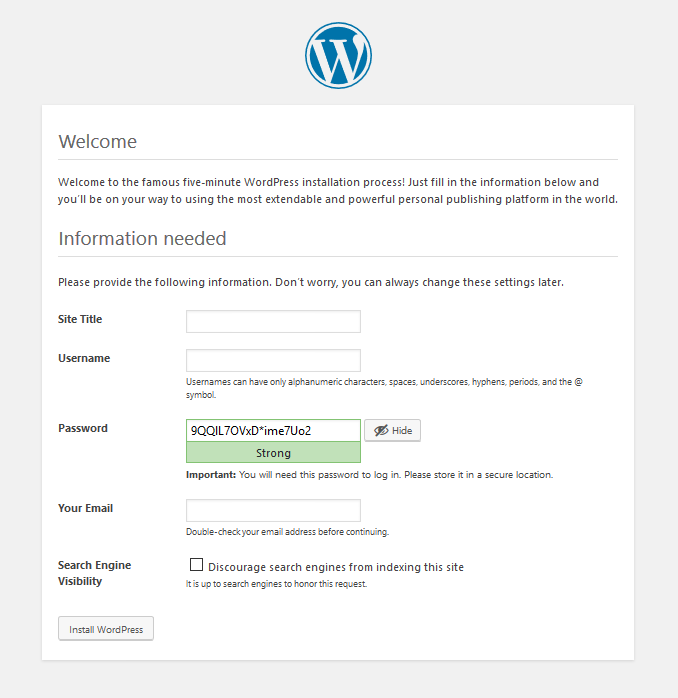
Step 10: WordPress will now create database table for you and you will be in the next step. Now fill in the gaps of Site Title, Username, Password, and Admin email address. Insert all the information properly and click on Install WordPress. If you do not want to make your website and pages visible to the Search Engine, then you can check the box next to Search Engine Visibility. When the website is fully ready, you can change the visibility from WordPress Settings.
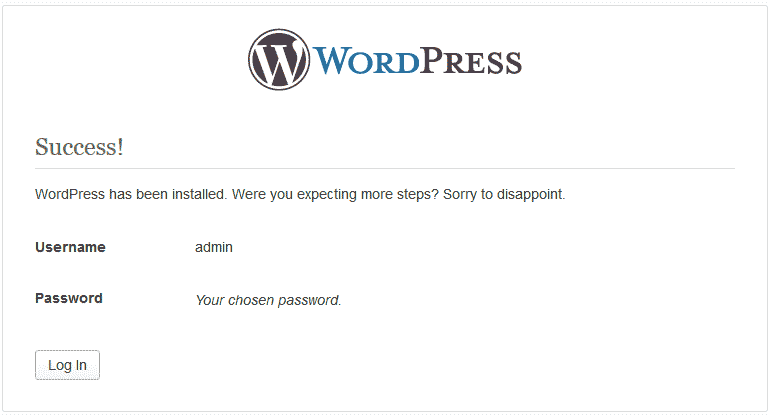
And you are done! You will see the feedback message showing your username. Now click Log In to enter into your WordPress Dashboard.
Great! Now you know how to install WordPress manually.
We hope this tutorial helps you find the perfect solution. If your like our tutorials, definitely you’ll love our support. All VernalWeb hosting plans include 24/7 support from our amazing inhouse support staff. Check out our web hosting plans and have your website migrated today!