SSL (Secure Sockets Layer) has become one of main keys behind the success in Online Businesses. It enables a server to create a encrypted connection with a browser so that no third party can breach it. Let’s Encrypt has started to offer Free SSL Certificate to make web a better place. Installing SSL Certificates by Let’s Encrypt isn’t a tough task to accomplish. Here we’ve discussed about Let’s Encrypt SSL Installation in cPanel.
Step by step guide on How to install a Let’s Encrypt SSL Certificate from cPanel:
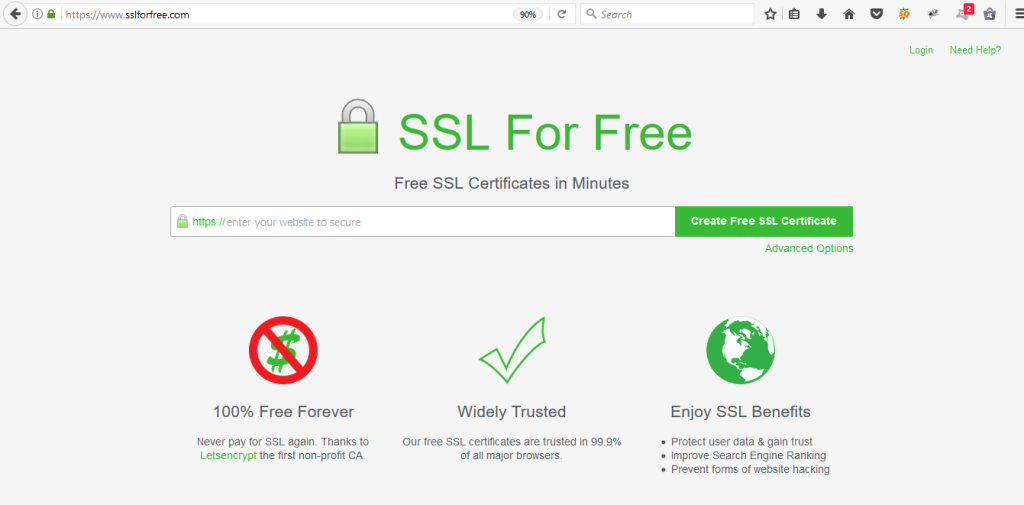
STEP 1: Open a Browser & navigate to https://www.sslforfree.com/
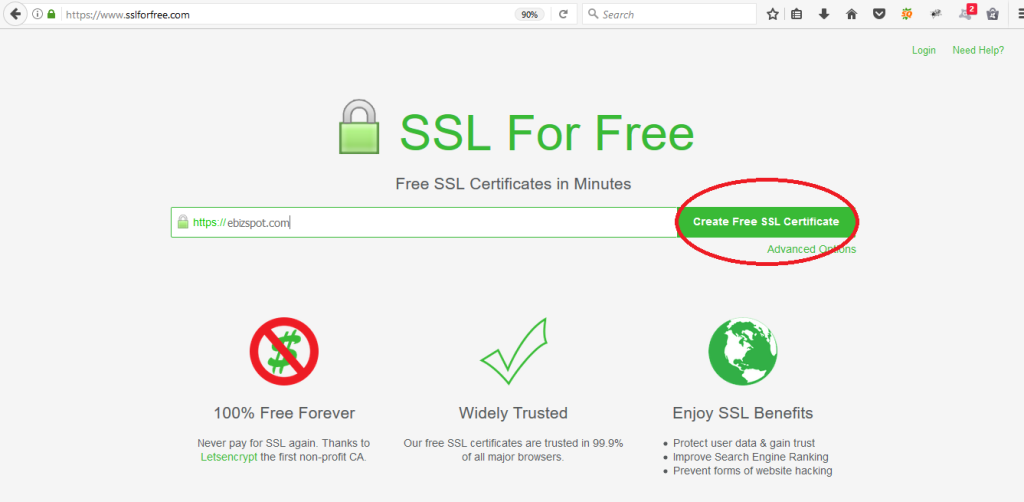
STEP 2: Enter the domain name (I used ‘ebizspot.com’) for which you want to enable SSL Certificate & click on ‘Create Free SSL Certificate’ button.
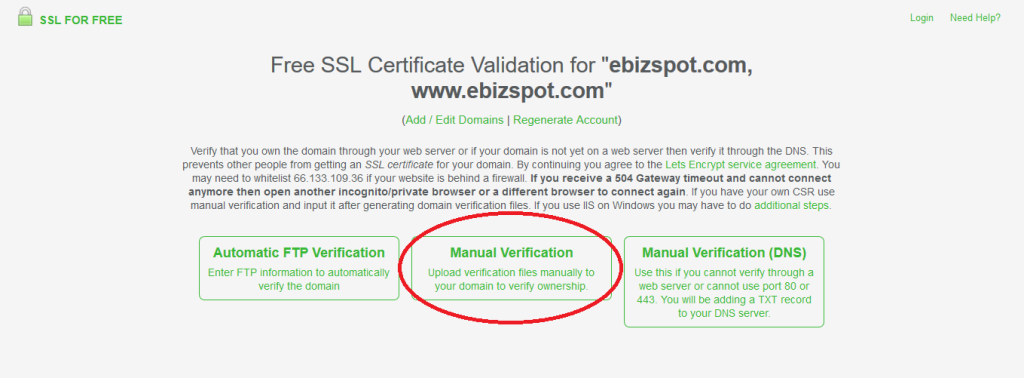
STEP 3: Click on ‘Manual Verification’.
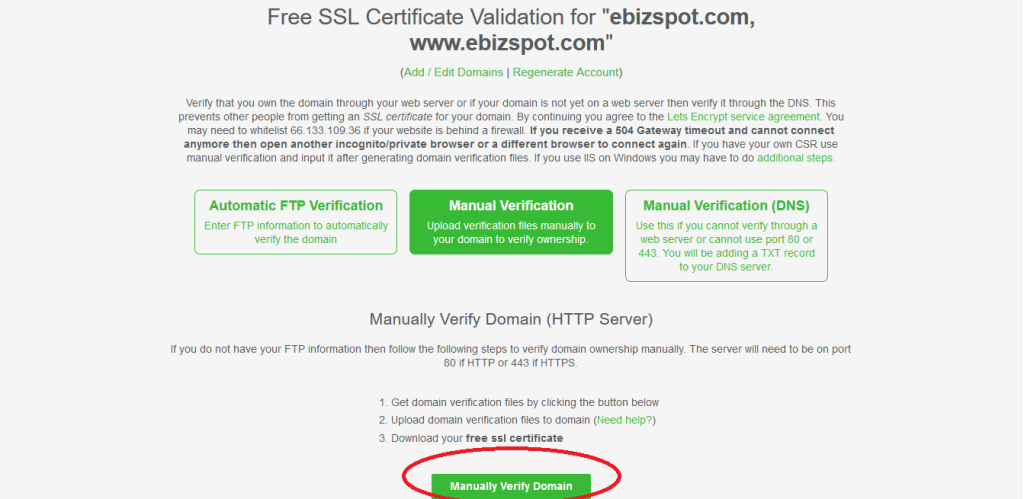
STEP 4: Scroll down a little & click on ‘Manually Verify Domain’
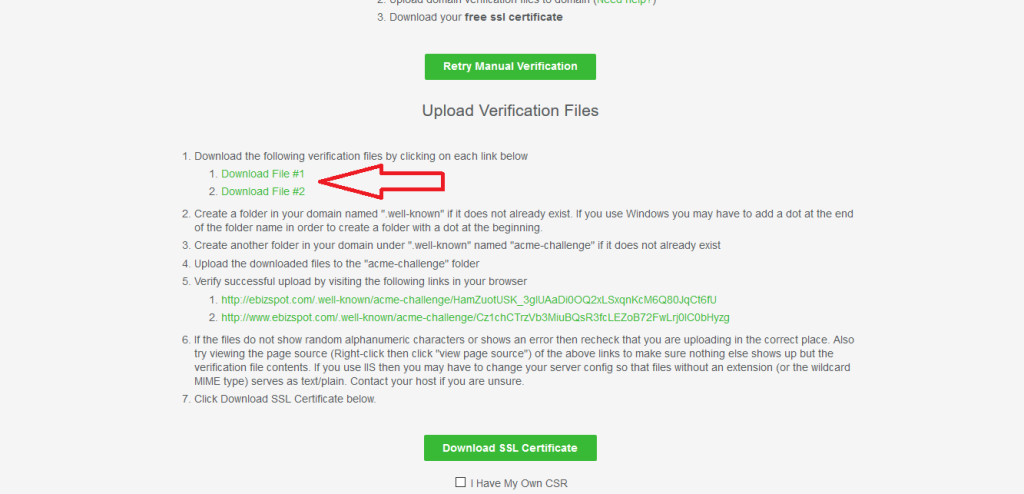
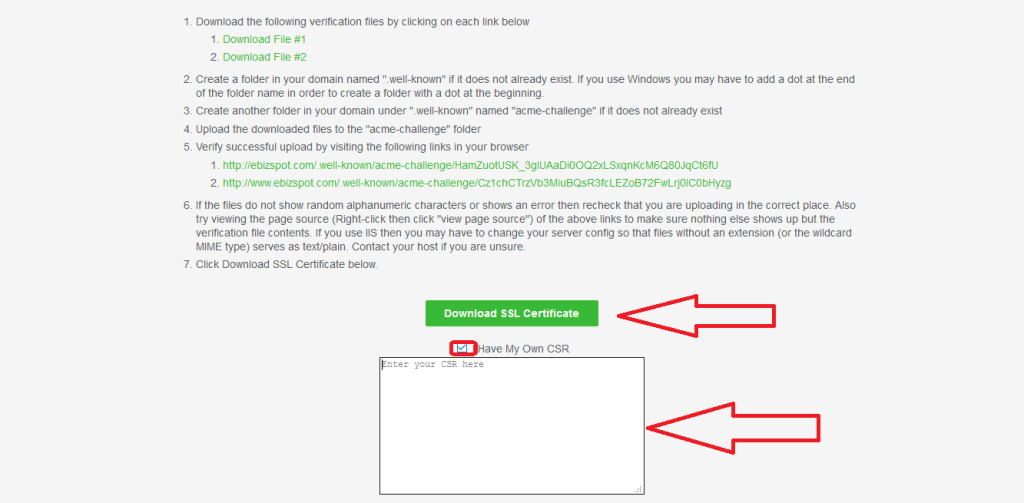
STEP 5: Download verification files.
STEP 6: Log into your cPanel account.
STEP 7: Click on ‘File Manager’ in the Files section.
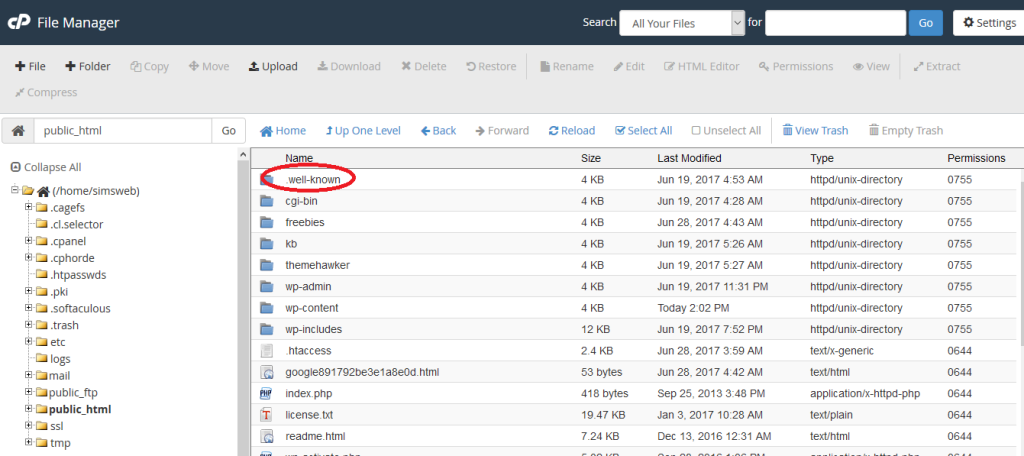
STEP 8: Create folder named ‘.well-known’ in ‘public_html’ & browse that folder.
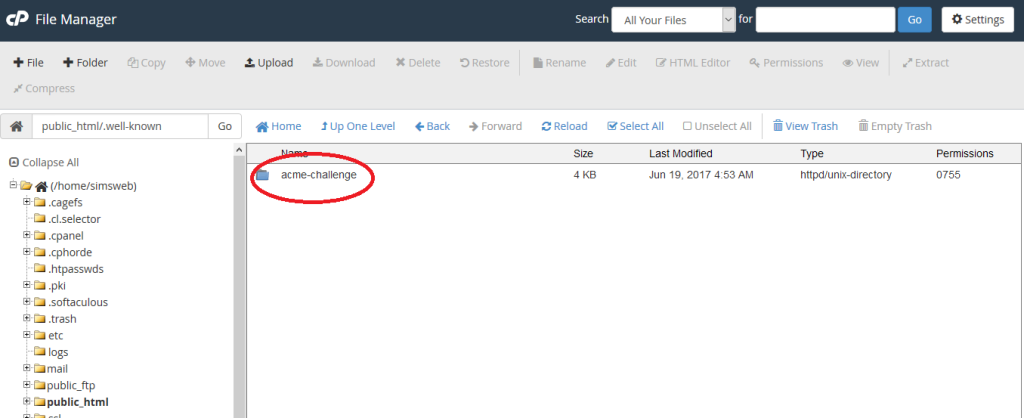
STEP 9: Again create a folder named ‘acme-challenge’ inside ‘.well-known’ folder & put the verification files that you’ve already downloaded in this folder.
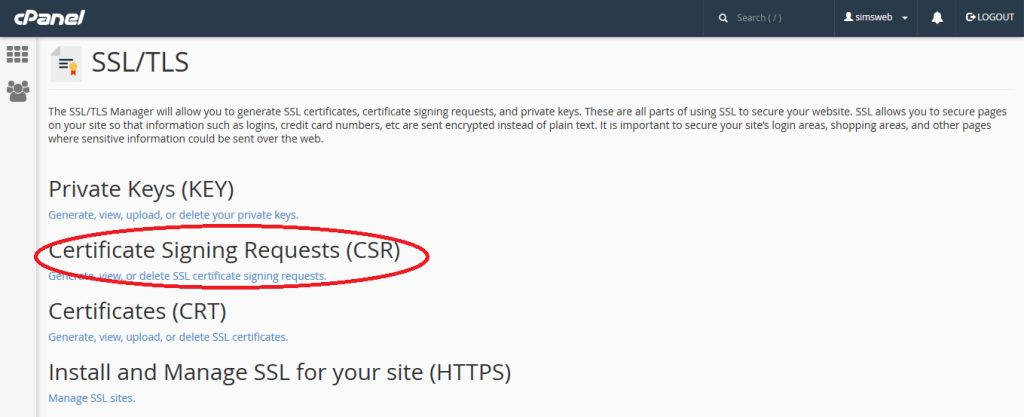
STEP 10: Go back to cPanel & search for ‘SSL/TLS’ in the ‘Security’ section.
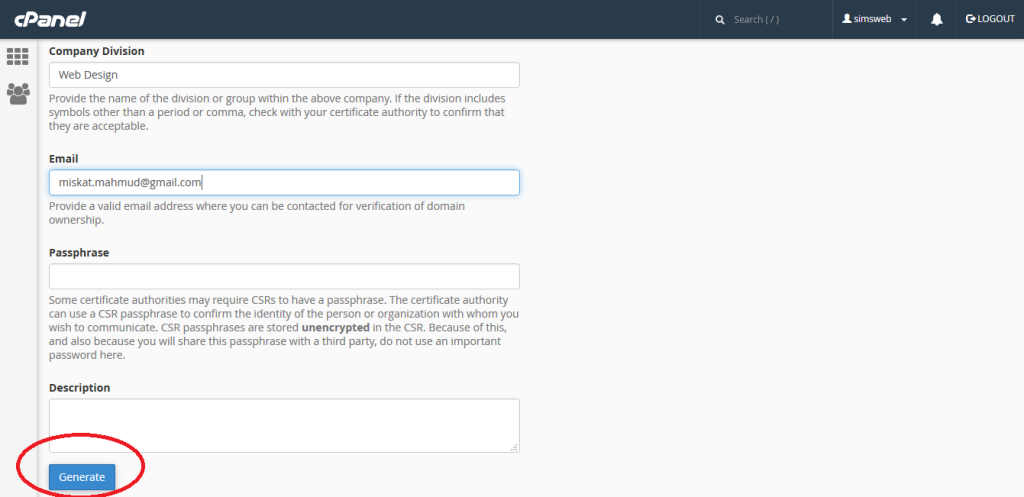
STEP 11: Click on ‘Certificate Signing Requests’
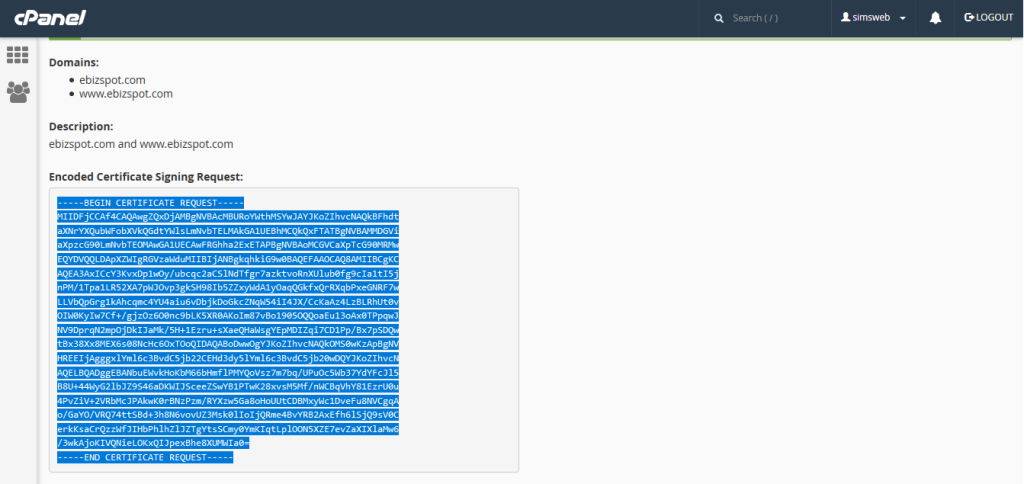
STEP 12: Fill out the form carefully & click on ‘Generate’ button & you’ll get encoded ‘CSR’ on the next screen.
STEP 13: Copy the generated CSR.
STEP 14: Now go back to the screen you left at ‘STEP 5’ Check on ‘I have my own CSR’ you will now be given a text box to enter your CSR. Put it there & click on ‘Download SSL Certificate’.
STEP 15: Now you’ve got your desired SSL Certificte.
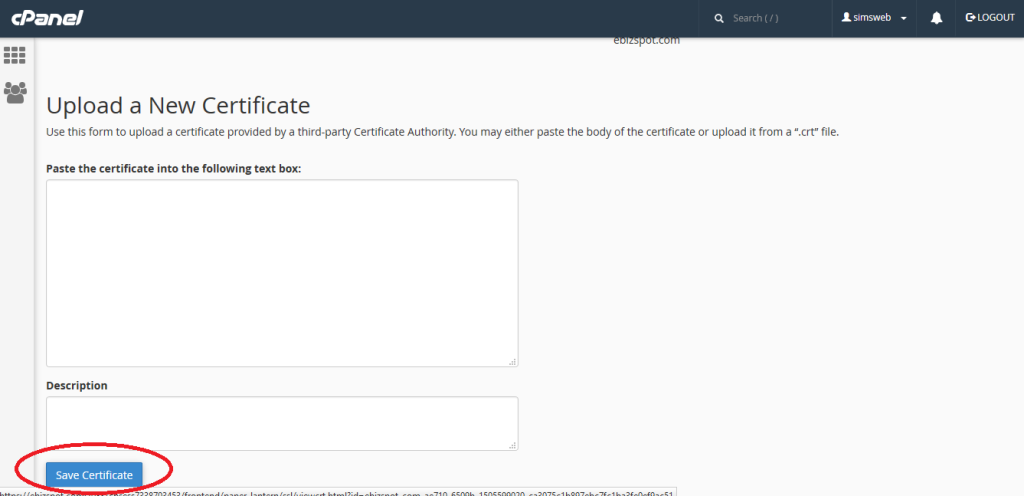
STEP 16: Go back to ‘SSL/TLS Manger’ in cPanel & click on ‘Certificate (CRT)’
STEP 17: Paste your certificate here & click on ‘Save Certificate’
STEP 18: Once your certificate is saved go back to SSL/TLS Wizard again & click on ‘Manage SSL Sites’
STEP 19: Select the domain name from the drop down & click on ‘Autofill by Domain’
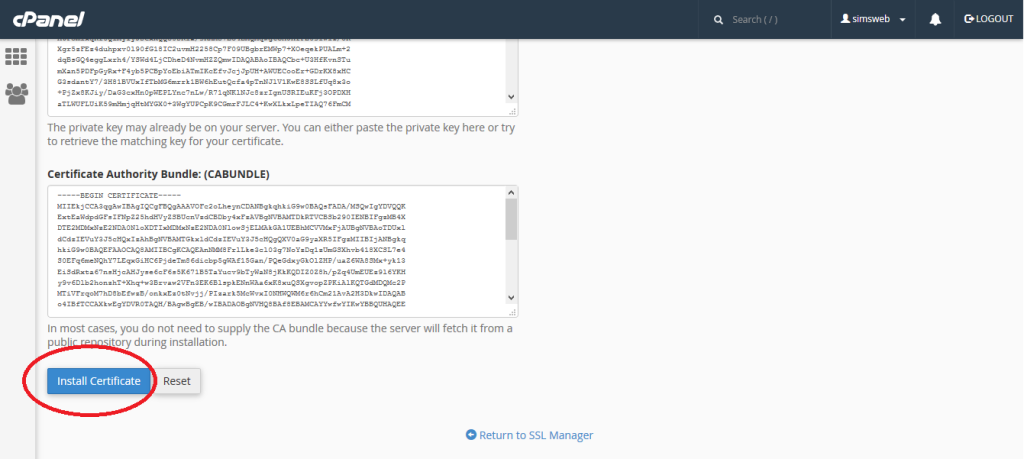
STEP 20: Scroll down a little & click on ‘Install Certificate’.
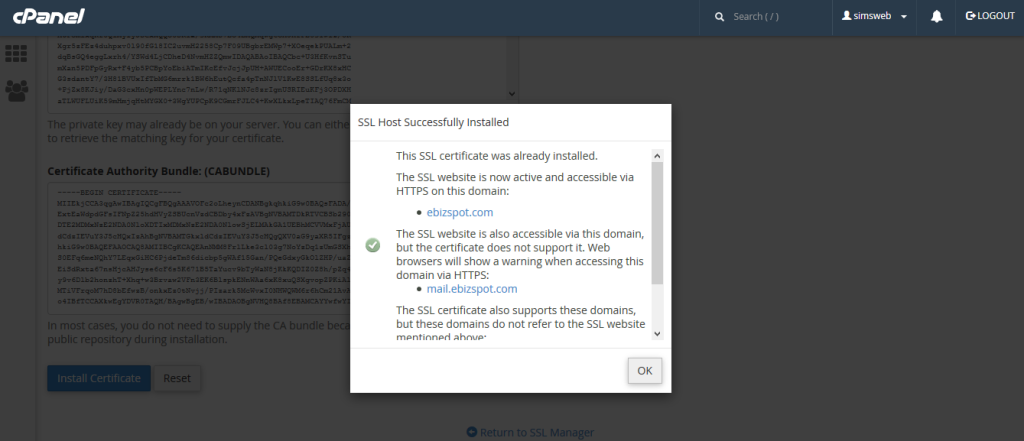
All done: A pop up screen with SSL Installation Confirmation will appear.
Congratulations, you are now ready to roar with an SSL Certificate by Let’s Encrypt.
VernalWeb includes Free Let’s Encrypt SSL with all Hosting plans. So you don’t need to take face hassle to install it by yourself.
We hope this tutorial helps you find the perfect solution. If your like our tutorials, definitely you’ll love our support. All VernalWeb hosting plans include 24/7 support from our amazing inhouse support staff. Check out our web hosting plans and have your website migrated today!
