
If you are familiar with PHP, you may heard about the php.ini file. There are some certain scenarios when you may need to change or update your PHP configuration in your cPanel. You can do it easily by editing the php.ini file. There are several options to edit your php.ini file. Let’s go through some methods for editing the php.ini file.
What is php.ini file?
You are most likely to encounter some errors (or have already) when working on your PHP applications, that are specific to configurations. Other times, you may want to make some changes to the configurations on how you can use PHP in your applications. In such scenarios, you almost always will be required to edit something on the php.ini file.
The php.ini file is the default configuration file for running applications that require PHP. It is a plain text file that is used to alter PHP settings such as:
- Displaying or hiding log errors
- The uploading maximum size
- The maximum time to execute a PHP script
- The resource usage limits
- Etc
Each time PHP is initialized, the php.ini file is read by the PHP interpreter to determine what settings to use.
Using Select PHP Version
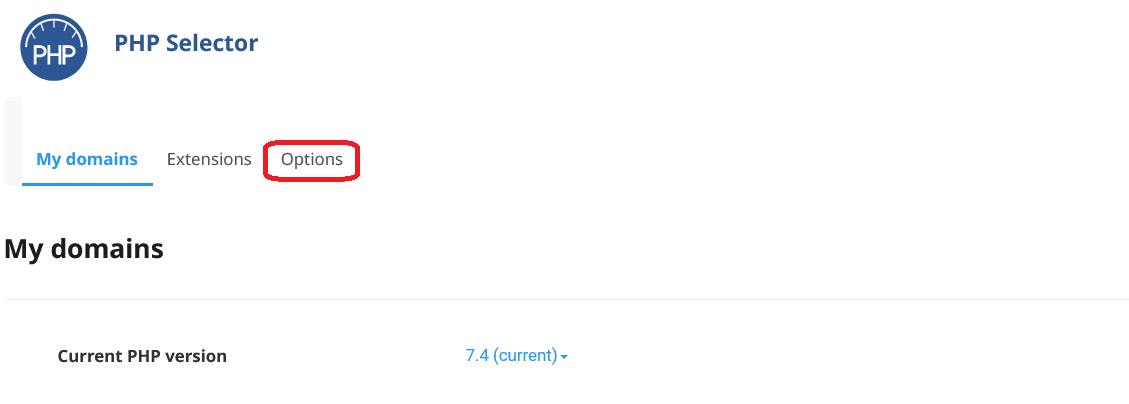
You can edit the php.ini file using Select PHP Version option.
2. Go to the Software section and click on Select PHP Version

3. Click on the Options
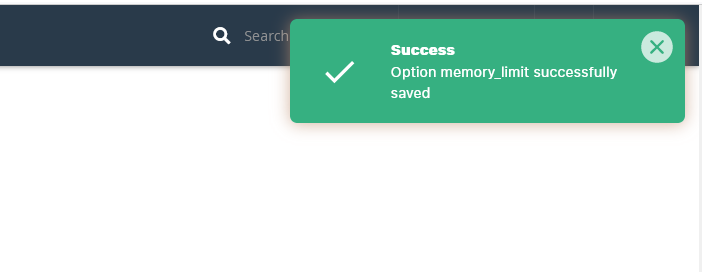
4. Locate the PHP directive you wish to amend and click the value. A dropdown menu or text input box will appear, allowing you to change the value as required. Check your script, plugin, or theme’s documentation (or an on-screen error message) to find the correct value. Do not exceed this value, or your server could become unstable.
Your changes will should save automatically, and you should see a green success feedback pop up in the top right corner.
This is how you can edit the php.ini file using Select PHP Version.
Using MultiPHP INI Editor
You can edit the php.ini file using Select MultiPHP INI Editor.
2. Go to the Software section and click on MultiPHP INI Editor.

There are two methods for editing the php.ini file
- Basic Mode (Allows you to edit the configurations through a form interface)
- Editor Mode (Allows you to edit the php.ini file directly from a text editor interface)

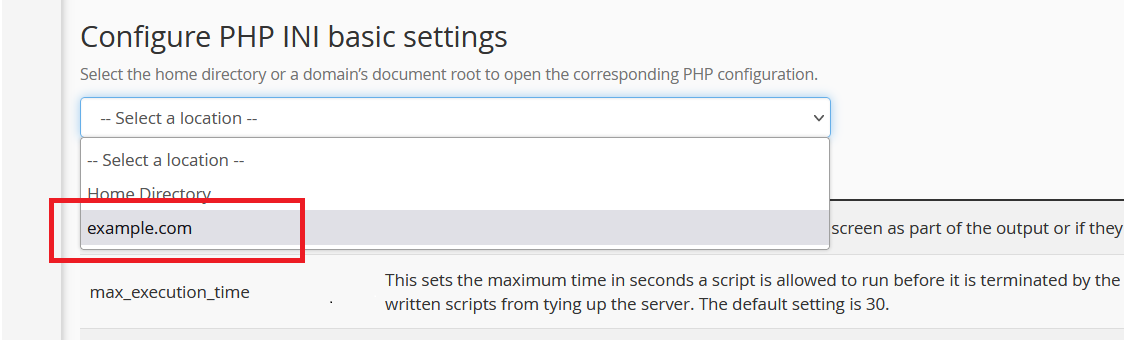
3. In the Basic Mode select your domain name from the dropdown and the configuration options will appear in a table. The “PHP Directive” column has the configuration properties while the right column (Settings) has form input fields for entering the property values. The middle column (Information) contains a description for each configuration so it’s much intuitive to work with. Fill in the form and click the “Apply” button at the bottom to save the changes once you are done.
4. In the Editor Mode select your domain name from the dropdown and make all your preferred configuration changes then click on the “Save” button on the top-right once done.
Now you know how to edit the php.ini file using MultiPHP INI Editor.
Using File Manager
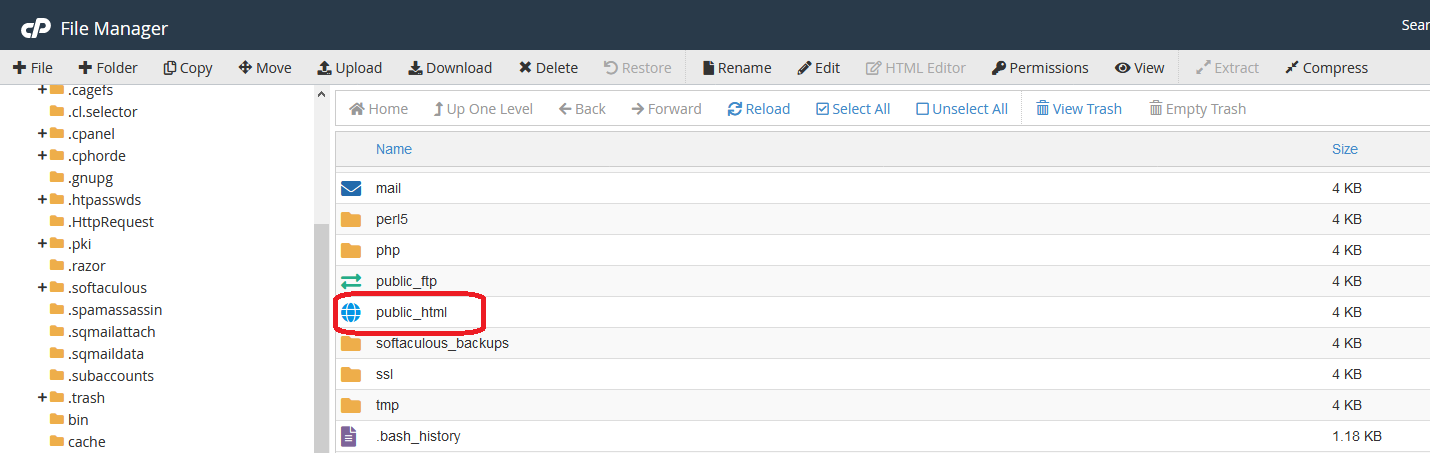
1. By default, the php.ini file is located on the domain root directory of your server, that is “public_html” folder. To access edit it, click on the “File Manager” under the Files section in cPanel.

2. Go to the “public_html” folder.
3. You will find the php.ini file in this directory. If you don’t find it you can create a new one. Right-click on this file and select “Edit” from the options that appear. It will be opened in a text editor interface. Make changes/updates to the configurations and once done click the “Save Changes” button at the top-right.
Now you know how to edit php.ini file in cPanel.