
CyberPanel is great cPanel alternative opensource control panel with feature-rich email service including Email Forwarding, Spam Control, Sending Rate Limit & many more. In this tutorial we will show you how to configure CyberPanel email server.
Create a CyberPanel Email Account
Once you have added your domain to the CyberPanel website hosting, you will be able to create your email accounts associated to the hosted domain.
2. Navigate to Email & then click Create Email.
3. Select the website you want to create your email address on it.
4. Enter your User Name & a strong Password
5. Hit the Create Email button
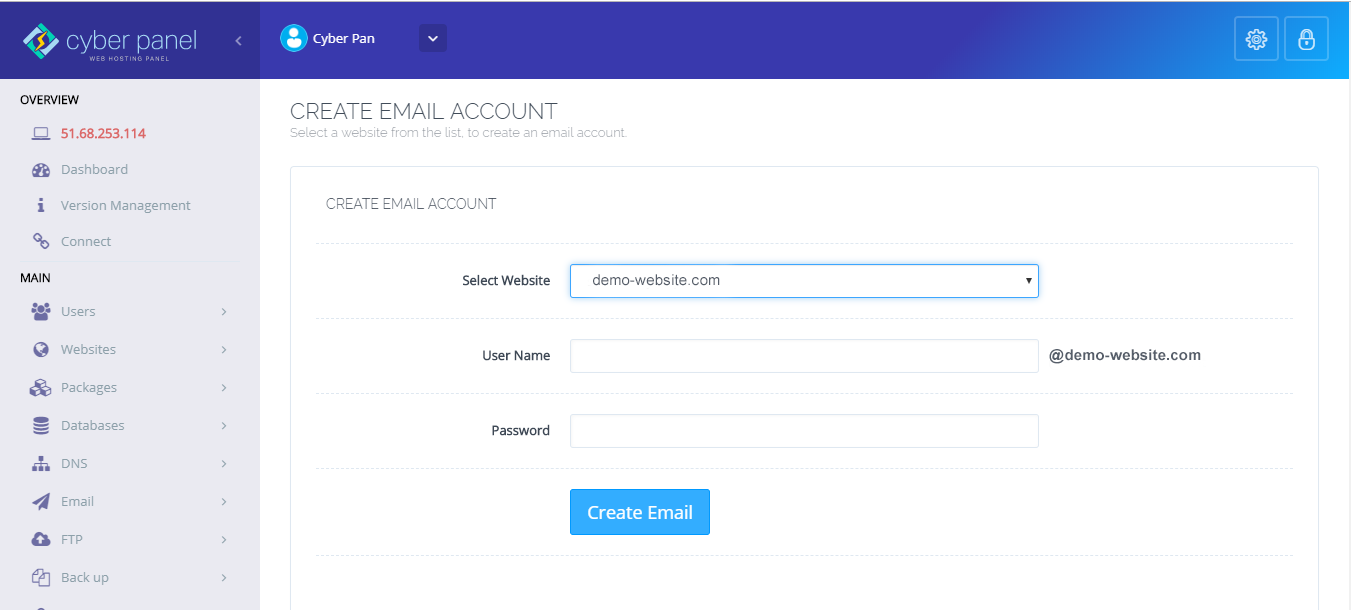
Now your email account has been created.
Access Webmail Using RainLoop
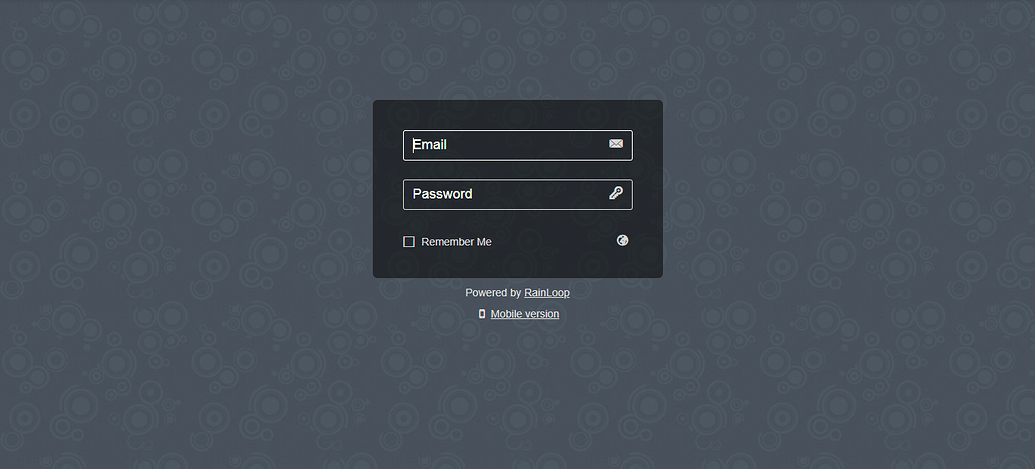
1. In the left menu, click on the Email & then click Access Webmail
2. You will be redirected to the RainLoop login panel. Enter your Email & Password to login
Reset Email Account Password
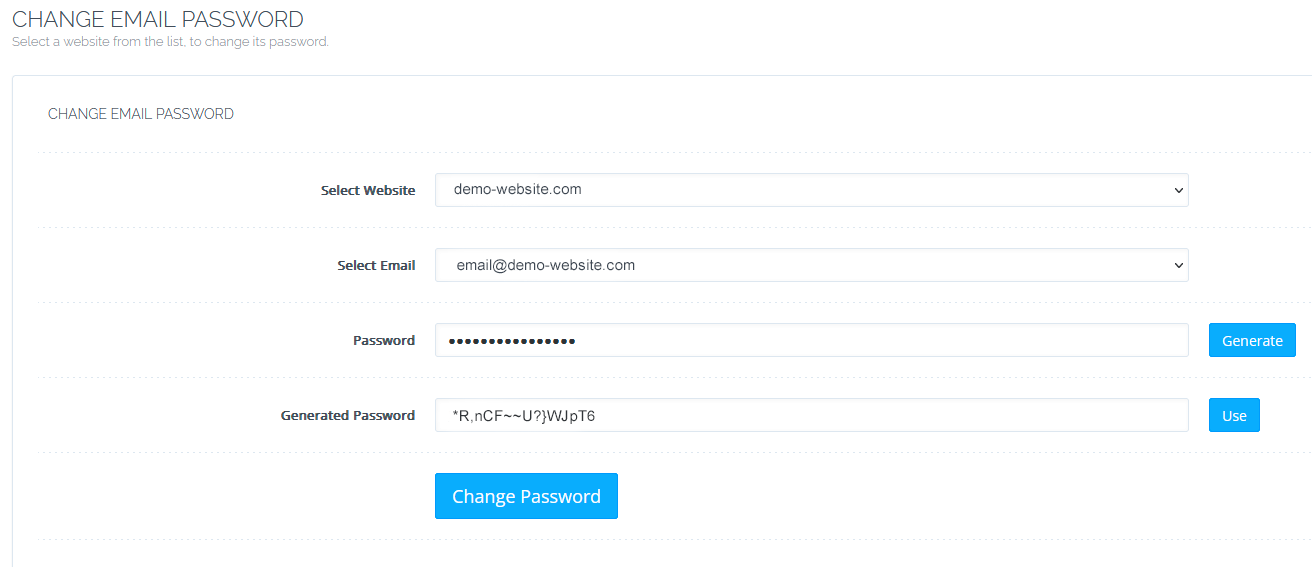
You can reset your CyberPanel Email Account Password by following these steps
1. Navigate to Email & then click Change Password
2. Select the website containing email account from the dropdown menu
3. Select the email address you want change password
4. Enter the new password
5. Hit the Change Password button
Delete Email Accounts
1. Navigate to Email & then click Delete Email
2. Select a website from the list
3. Select an email account from the drop-down menu
4. Select Delete Email
5. Select Are you sure? to confirm
Now you are done!
Setup Email Forwarding
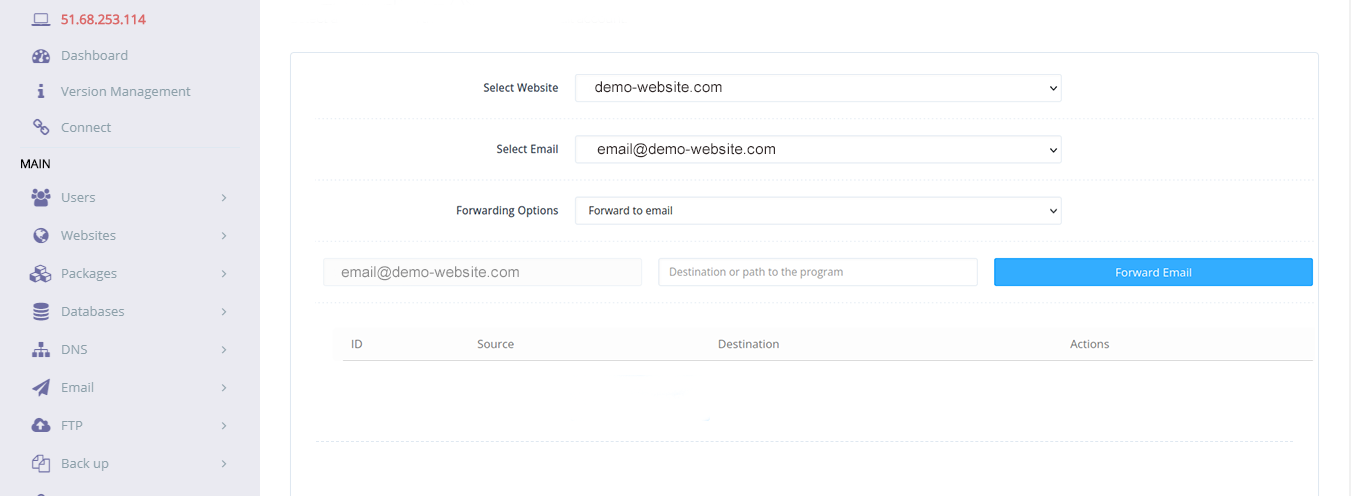
1. Navigate to Email & then click Email Forwarding
2. Specify the domain from Select Website options
3. Select the email account you want to forward
4. Choose a forwarding option from Forward to email or Pipe to program
5. Enter the destination address or path to the program
6. Click Forward Email to complete the process
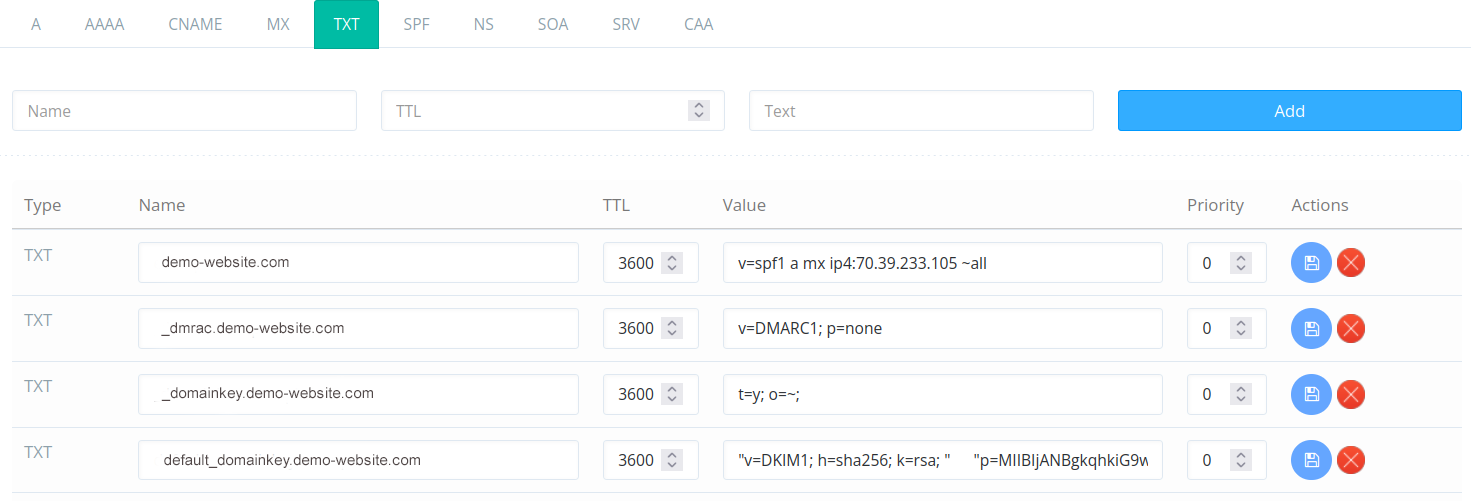
Configure DKIM DNS Records
1. Navigate to DNS & then click Add/Delete Records
2. Choose the domain
3. Click the TXT tab
4. Look for a DNS record named “default._domainkey.[yourdomain].com” with a value starting with “”v=DKIM1.”
5. If the record is missing, click Email > DKIM Manager
6. Select the domain to auto-generate a DKIM record
To generate more records, repeat the above steps.
Configure Spam Filter
CyberPanel email service has two email security plugins. They are god enough to protect your email server.
1. Mail Settings > SpamAssassin -This popular spam filter lets you control how many suspicious indicators must be present before an email is flagged as spam.
2. Mail Settings > MailScanner – This email security suite, with the MailWatch graphical interface, scans for malware, manages blocklists, and more. Log into your MailWatch instance with your CyberPanel admin credentials.