Need to update Nameservers of a Domain to migrate from one Host to another? Well, there are thousands of Websites migrating from one host to another everyday & it’s not a tough task to update Nameservers of a Domain yourself. Here is a step by step guide to update Nameservers of a Domain:
Update Nameservers of a Domain:
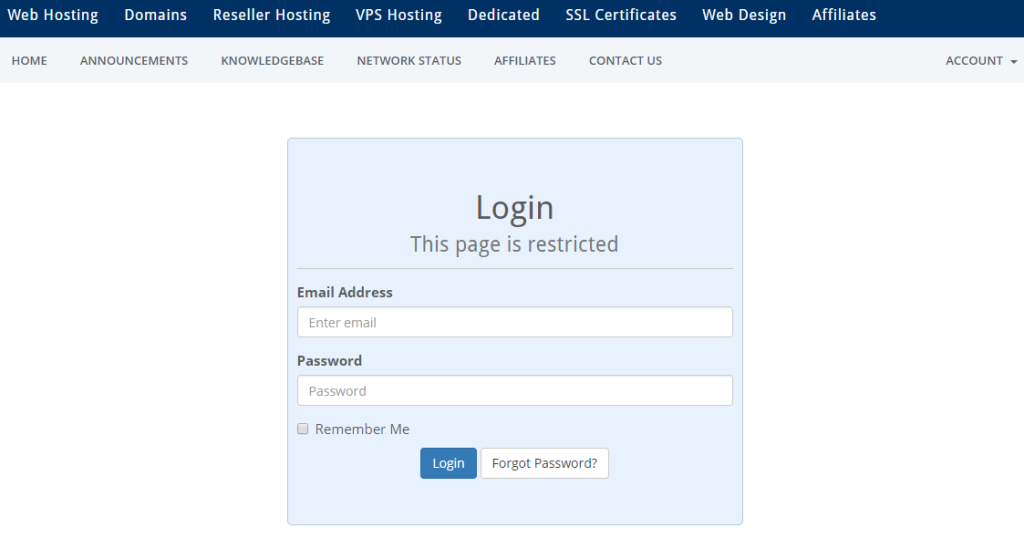
STEP 1: Log into your account where the domain you’re trying to change Nameservers is on.
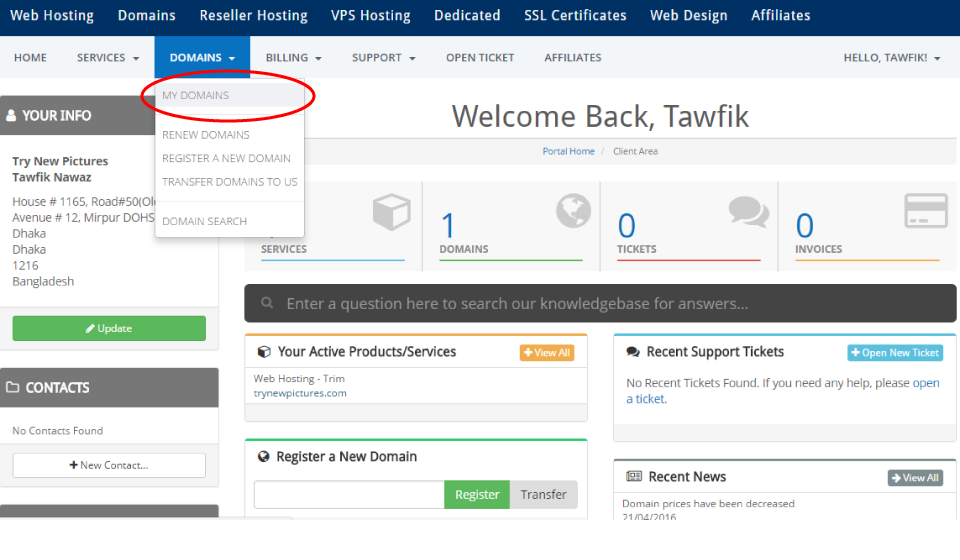
STEP 2: Once you’re logged in click on ‘Domains’ and a drop down will appear. Click on the ‘My Domains’ menu which will take you to the list of the domain names under your account.
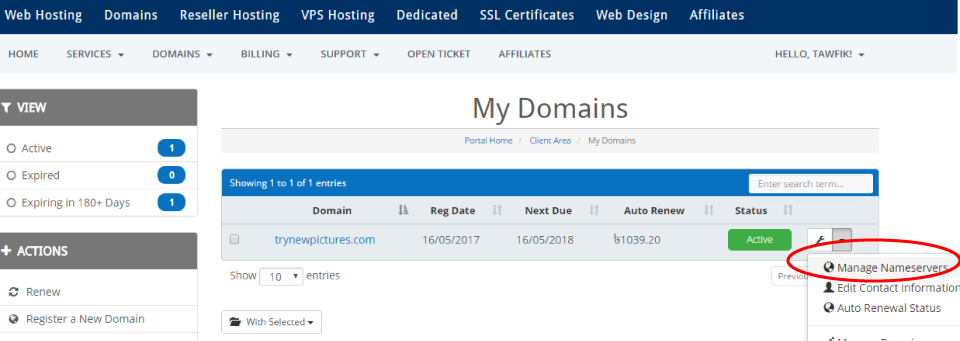
STEP 3: Find out the domain name of which you are trying to update the Nameservers. Click on the down arrow right beside the wrench button on the same line of the domain name. A drop down will appear. Click on ‘Manage Nameservers’ menu on the drop down and you will be taken to the list of current nameservers for that particular domain.
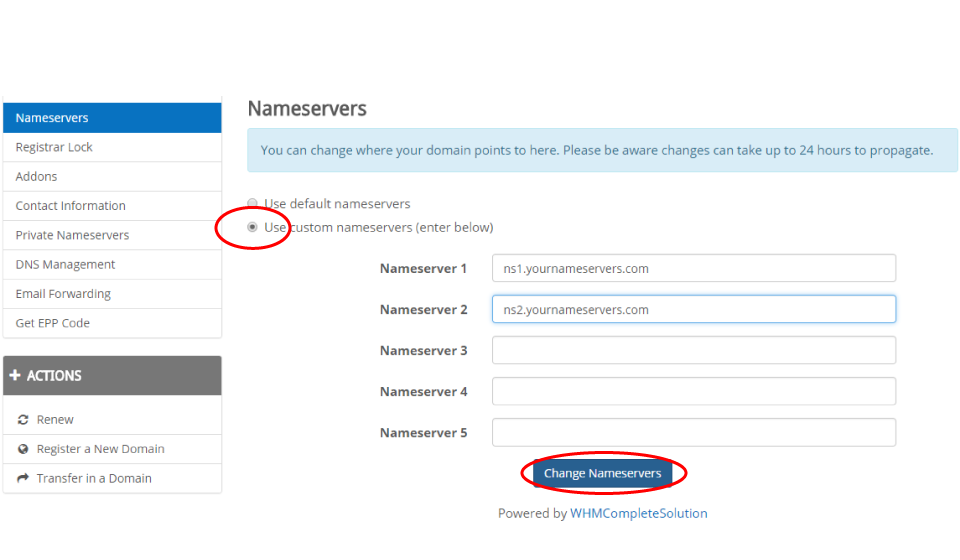
STEP 4: Select the radio button beside ‘Use custom nameservers (enter below)’ on the top of the page. Then enter your desired Nameservers on the Nameserver 1 & Nameserver 2 field & then click on ‘Change Nameservers’. You’re all done.
Important: It may take up to 24 hours the new Nameservers to be propagated.
We hope this tutorial helps you find the perfect solution. If your like our tutorials, definitely you’ll love our support. All VernalWeb hosting plans include 24/7 support from our amazing inhouse support staff. Check out our web hosting plans and have your website migrated today!


